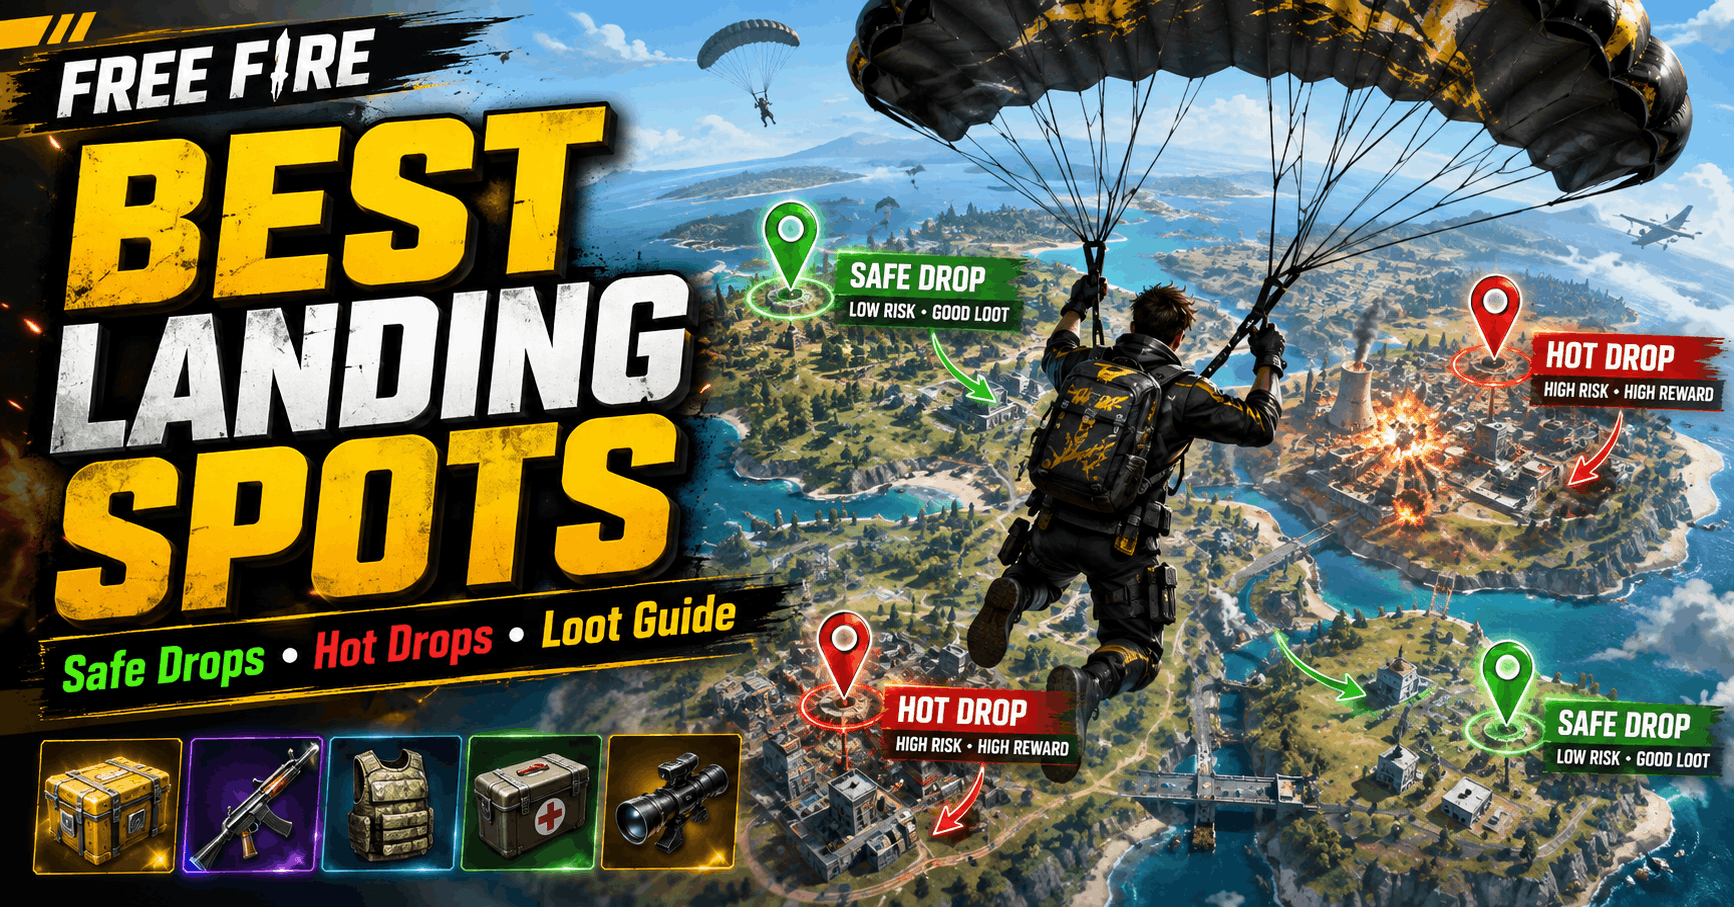
Choosing the best landing spot in Free Fire is not simply about landing where the most loot is available. A good drop should give you enough weapons and supplies to survive the opening minutes, manageable enemy pressure, and a practical route toward the next safe zone.
That is even more important after the OB54 update, because Free Fire now shows the loot tier of major locations while you are parachuting. Instead of blindly following an old “best loot location” list, you can compare the current match’s locations before committing to a drop.
If you want quick recommendations, Mars Electric and Katulistiwa are strong Bermuda options for survival and rank pushing, while Clock Tower and Pochinok are better for aggressive players looking for early fights.
On other maps, locations such as The Hub, Refinery, Brasilia, Marbleworks, Zipway, and Grav Labs are worth considering depending on your playstyle.
Important 2026 update: Alpine and Bermuda 2.0 were removed from Free Fire in the OB54 update released on June 23, 2026. Older landing guides that still recommend Alpine are therefore outdated.
Best Free Fire Landing Spots at a Glance
The risk ratings below are practical estimates rather than official Garena classifications. The actual danger of any location changes depending on the aircraft route and how many players choose the same area.
| Landing Spot | Map | Best For | Typical Risk |
|---|---|---|---|
| Mars Electric | Bermuda | Rank push / balanced play | Low–Medium |
| Katulistiwa | Bermuda | Safer starts | Low–Medium |
| Pochinok | Bermuda | Loot + aggressive play | Medium–High |
| Clock Tower | Bermuda | Early kills | Very High |
| Mill | Bermuda | Positioning / rotation | Medium |
| The Hub | Solara | Fast rotations / fights | High |
| Bloomtown | Solara | Balanced squad play | Medium |
| TV Tower | Solara | Positioning / combat | Medium–High |
| Refinery | Kalahari | Aggressive gameplay | High |
| Brasilia | Purgatory | Hot drops | Very High |
| Marbleworks | Purgatory | Loot + cover | High |
| Zipway | NeXTerra | Loot + mobility | Medium–High |
| Grav Labs | NeXTerra | Tactical fighting | High |
How to Choose the Best Landing Spot in Free Fire
There is no single landing location that will be best in every match.
Before jumping from the aircraft, check three things:
- Flight path
- Displayed loot tier
- How many enemies are parachuting toward the area
The OB54 update introduced an area loot-tier indicator beneath major location names during the parachuting phase. This gives you useful information before you reach the ground.
A normally average landing location can become one of the best choices if it has attractive loot and very few opponents.
At the same time, a famous location can become a poor choice if multiple squads are already heading toward it.
Simple Landing Rule for Rank Push
For survival-focused games:
Good loot + fewer enemies + easy rotation is usually better than a famous hot drop.
Simple Landing Rule for Kills
For aggressive games:
Good loot + several nearby opponents + useful cover usually creates better early-game fighting opportunities.
Learning this difference is more useful than memorising a fixed list of five landing locations.
Best Bermuda Landing Spots
Bermuda remains one of Free Fire’s most recognisable maps, but its loot distribution has changed considerably through updates.
Garena’s OB50 update reduced loot in popular areas such as Clock Tower, Observatory, and Peak, while increasing loot around Katulistiwa, Mars Electric, Pochinok, and areas surrounding Peak.
That means older advice telling every player to automatically land at Peak is no longer particularly reliable.
1. Mars Electric — Best Balanced Bermuda Landing Spot
Best for: Rank pushing, solo players, beginners, and players who prefer gearing up before fighting.
Mars Electric is one of the better default landing choices for players who do not want their entire match determined within the first few seconds.
Its advantages include:
- enough space to spread out while looting
- comparatively manageable early-game fights
- useful rotation possibilities
- improved loot following Bermuda’s OB50 balancing
Garena specifically increased the loot available around Mars Electric during the OB50 map adjustments.
When Should You Avoid Mars Electric?
Do not automatically land there if the aircraft passes directly over the location and several squads immediately jump.
A normally calm location can quickly become a hot drop simply because of the flight path.
Always watch the players around you while parachuting.
2. Katulistiwa — Best Bermuda Landing Spot for Rank Push
Best for: Beginners, BR Ranked players, and survival-oriented gameplay.
Katulistiwa is another strong Bermuda option for players who prefer surviving the early game before taking fights.
Its loot was increased during the OB50 update, making it more attractive for players who want to build a reasonable loadout without immediately fighting several squads.
Katulistiwa works well when you want to:
- collect your initial weapons
- find armour and supplies
- avoid immediate squad fights
- watch where nearby enemies land
- begin fighting after becoming properly equipped
However, no named location in Free Fire is permanently safe.
If Katulistiwa lies directly under the aircraft route and you see several enemies heading there, consider switching to a nearby backup location.
3. Pochinok — Best Balanced Aggressive Drop
Best for: Players who want early fights without relying entirely on Clock Tower or Peak.
Pochinok offers plenty of buildings, different looting routes, and numerous opportunities for close-range engagements.
Its loot was also increased during OB50.
That combination makes Pochinok a good middle ground between survival-focused edge locations and extremely aggressive hot drops.
Best Squad Strategy for Pochinok
Avoid having all four squad members land on exactly the same roof or doorway.
Instead, divide nearby buildings between teammates while staying within supporting distance.
This helps your squad:
- collect weapons faster
- avoid competing for the same ammunition
- cover more loot
- respond quickly if one teammate encounters an enemy
4. Clock Tower — Best Bermuda Hot Drop
Best for: Early kills, close-range fighting practice, and aggressive gameplay.
Clock Tower remains one of Bermuda’s most recognisable combat locations.
Garena identified Clock Tower as one of Bermuda’s highly popular areas while rebalancing the map, although its loot quantity was reduced during OB50.
Because of this, Clock Tower should be viewed primarily as an action-oriented landing location, not automatically the map’s best loot location.
Land at Clock Tower If:
- you intentionally want early fights
- your squad communicates effectively
- you are confident fighting with whatever weapon you find
- you want to practise close-range engagements
- you are comfortable reacting quickly after landing
Avoid Clock Tower If:
- survival is your main BR Ranked objective
- your squad regularly becomes separated
- multiple teams are already landing before you
- you struggle when forced to fight without ideal weapons
5. Mill — Good for Positioning and Rotation
Mill can be useful for players who value terrain, movement options, and positioning rather than simply looking for the largest building cluster.
Garena has previously added a Revival Point and Player Launcher around Mill, increasing the area’s usefulness for rotation and recovery.
If several players contest the main structures, however, do not waste the opening minute fighting over the exact same building.
Landing slightly away, collecting equipment, and re-engaging from a stronger position can be the smarter option.
Is Peak Still a Good Landing Spot?
Peak is still an iconic Bermuda location and remains suitable for aggressive players.
However, it should not automatically be described as Bermuda’s best loot destination.
Garena previously increased Peak’s loot significantly, but later reduced loot in Peak and several other extremely popular areas during OB50.
Loot was also increased in areas surrounding Peak.
The better strategy in 2026 is to check the current loot-tier display before deciding whether Peak is worth contesting.
Best Solara Landing Spots
Solara was introduced in May 2025 and brought a much greater emphasis on movement and fast rotations.
One of the map’s defining features is its Slide system, which connects different regions and allows players to move across the map quickly.
Because of this, landing strategy on Solara can differ significantly from Bermuda.
You can sometimes land farther from the centre of the map and still rotate efficiently.
1. The Hub — Best Solara Landing Spot for Mobility
Best for: Aggressive squads and players who prioritise fast rotations.
The Hub is one of Solara’s signature locations.
Its connection to the Slide system gives players several opportunities to:
- loot quickly
- engage nearby opponents
- reposition after fights
- rotate into different areas of Solara
This makes The Hub particularly appealing to aggressive players.
However, expect competition whenever the aircraft route makes it easy to reach.
2. Bloomtown — Best Balanced Solara Landing Spot
Best for: Squads, medium-risk matches, and building-to-building fighting.
Bloomtown has a relatively dense layout compared with many of Solara’s more open regions.
Its buildings and winding pathways allow players to:
- break enemy line of sight
- loot separate structures
- regroup quickly
- defend against rushing opponents
For many squads, Bloomtown can offer a better balance between fighting and survival than immediately contesting Solara’s busiest areas.
3. TV Tower — Best for Positioning
TV Tower is another useful Solara location for players who enjoy fighting around elevation.
Garena redesigned several high-ground areas around TV Tower and Studio during the OB51 update.
Because of these changes, very old videos showing specific elevated positions or angles may no longer accurately represent the current version of the map.
TV Tower works best for players who are comfortable repositioning and fighting around different levels of terrain.
4. Bayside — Good Backup Landing Spot
Bayside can be useful when Solara’s central locations are heavily contested.
Instead of permanently treating Bayside as either safe or dangerous, consider it when:
- the flight path favours another part of the map
- too many enemies are heading toward your preferred location
- Bayside shows an attractive loot tier
- you want to avoid an immediate hot drop
Best Kalahari Landing Spots
Kalahari was designed to offer a different combat experience from Bermuda and Purgatory.
Its terrain places significant emphasis on:
- elevation
- cover
- movement
- positioning
This means good positioning can sometimes matter as much as finding better weapons.
1. Refinery — Best Kalahari Hot Drop
Best for: Aggressive players and squads looking for early eliminations.
Refinery remains one of Kalahari’s most recognisable combat locations.
It is commonly treated as a high-risk, high-reward landing area because it can attract numerous players when the flight path is favourable.
Land at Refinery when you intentionally want early combat.
Do not choose it simply because someone claims it has the best loot.
If several enemies are reaching weapons before you, theoretical loot quality will not help you survive.
2. Santa Catarina — Alternative Kalahari Drop
Santa Catarina is another useful Kalahari location and can serve as a backup when Refinery becomes too heavily contested.
When deciding between Refinery and Santa Catarina, consider:
- flight direction
- displayed loot tier
- enemy parachutes
- your intended rotation
- your preferred level of early-game risk
Best Purgatory Landing Spots
Purgatory contains a mixture of open areas and more densely built-up locations.
The map’s northern regions tend to include more open terrain, while several southern areas provide larger groups of buildings and urban-style combat.
That makes your landing location particularly important when deciding what type of weapons and positioning will be useful.
1. Brasilia — Best Purgatory Hot Drop
Best for: Aggressive players and squads looking for immediate action.
Brasilia is located close to the centre of Purgatory and contains numerous buildings.
Because of its positioning and available structures, it frequently attracts players looking for early fights.
If you are pushing rank and see several squads heading toward Brasilia, consider diverting.
There is little advantage in turning an important ranked match into a competition over who finds the first weapon.
2. Marbleworks — Best Purgatory Risk/Reward Drop
Best for: Squads that want loot, cover, and early fighting opportunities.
Marbleworks offers multiple structures while remaining close enough to important central areas for practical rotations.
For coordinated squads, its layout can make looting easier because teammates can split between nearby structures.
That makes Marbleworks a strong choice for players who want combat without automatically choosing the most chaotic central location.
3. Ski Lodge — Good Lower-Risk Alternative
Ski Lodge is worth considering when your main objective is survival.
Its more peripheral location can reduce the number of players immediately contesting the area compared with Purgatory’s central hot zones.
It becomes particularly attractive when locations such as Brasilia and Marbleworks appear heavily contested.
4. Golf Course — Situational Safe Drop
Golf Course can provide a slower start, but its open terrain creates another problem.
If enemies land nearby, there may be fewer opportunities to break line of sight.
Golf Course therefore works best when you can clearly see that few or no enemies are landing with you.
Best NeXTerra Landing Spots
NeXTerra has received several major changes to its combat areas, buildings, and movement routes.
Some locations now provide much better tactical options than they did in earlier versions of the map.
1. Zipway — Best NeXTerra Landing Spot for Mobility
Best for: Players who value movement, loot, and flexible rotations.
Zipway became considerably more useful following NeXTerra’s map changes.
Garena redesigned it into a high-tech industrial area and added more loot points while keeping its zipline-based movement.
That gives Zipway a useful combination of:
- loot
- structures
- mobility
- multiple rotation routes
For players who prefer having several escape or repositioning options, Zipway is one of NeXTerra’s most practical landing areas.
2. Grav Labs — Best NeXTerra Combat Drop
Best for: Tactical squads and players comfortable with vertical fights.
Grav Labs has received structural changes designed to create more varied attack routes.
Its elevated sections, indoor paths, barriers, and building spacing can create fights where positioning matters almost as much as weapon quality.
Choose Grav Labs if you enjoy tactical engagements rather than simply rushing directly toward the nearest opponent.
3. Deca Square — Flexible Alternative
Deca Square is another established NeXTerra combat location.
Its buildings and movement options make it useful as an alternative when Grav Labs attracts too many opponents.
Keeping several possible landing locations in your strategy prevents you from being forced into the same hot drop every match.
Best Free Fire Landing Spots for Rank Push
If your main objective is increasing your BR rank, consistency matters more than collecting several eliminations immediately after landing.
Good starting options include:
| Map | Rank-Push Landing Options |
|---|---|
| Bermuda | Mars Electric, Katulistiwa |
| Solara | Bloomtown or quieter edge locations |
| Kalahari | Secondary areas away from Refinery |
| Purgatory | Ski Lodge or uncontested Golf Course |
| NeXTerra | Zipway when not heavily contested |
The most important rule is simple:
A location is only safe if few enemies are actually landing there.
If ten or fifteen players suddenly choose your favourite “safe” location, it is no longer a safe landing spot.
Best Landing Spots for Early Kills
Players who want aggressive matches should look for locations that regularly create early engagements.
Good starting options include:
- Clock Tower or Pochinok on Bermuda
- The Hub on Solara
- Refinery on Kalahari
- Brasilia or Marbleworks on Purgatory
- Grav Labs on NeXTerra
Hot dropping can help you practise:
- fast looting
- shotgun fights
- SMG fights
- movement
- Gloo Wall placement
- fighting with limited equipment
However, constantly hot dropping is usually a poor strategy if your main objective is surviving longer and climbing BR Ranked.
Best Landing Strategy for Solo Players
Solo players should prioritise escape routes and flexibility.
A squad can revive teammates, trade eliminations, and provide cover. Solo players have much less room for mistakes.
Before reaching the ground:
- Mark your preferred building.
- Identify a nearby backup location.
- Watch enemy parachutes.
- Divert if another player will clearly reach the weapon before you.
- Pick up the first usable firearm instead of searching for your favourite gun.
- Take the first fight when you have a weapon or positioning advantage.
Giving up one contested building is usually smarter than landing directly behind an opponent who is about to collect a weapon.
Best Landing Strategy for Squads
Squads need to balance fast looting with the ability to support each other.
One common mistake is having all four players land on exactly the same roof.
That can create:
- poor loot distribution
- slower gearing
- competition for ammunition
- fewer weapons for teammates
- opportunities for enemies to surround the squad
Instead, divide a small group of nearby buildings between the team.
Stay close enough to support one another and regroup before rotating.
How the Flight Path Changes Your Landing Spot
A landing area’s danger level is never permanent.
Consider Clock Tower.
If the aircraft flies directly above it, many players may be able to reach it almost immediately.
If Clock Tower sits far away from the flight path, fewer players may attempt the drop.
This creates one of the most important rules in Free Fire:
Choose your final landing location after seeing the aircraft path, not before the match starts.
Instead of having one permanent landing spot, create a pool of three locations.
For example, a Bermuda player could use:
- Mars Electric for survival
- Pochinok for balanced games
- Clock Tower for aggressive games
Then choose the most suitable option according to the aircraft route.
Use the OB54 Loot-Tier Display
One of the most useful recent Free Fire additions is the location loot-tier display introduced with OB54.
Major area names can now display their loot tier while you are parachuting.
This means static “best loot location” lists should no longer make your entire decision.
If two locations offer similar rotations but one shows a better loot tier and fewer enemies are heading toward it, choosing the less contested location may give you a much stronger start.
The best Free Fire landing spot is therefore often match-dependent.
Use BR Match Review to Improve Your Landing Strategy
OB54 also introduced BR Match Review for BR Ranked and custom matches.
The review can show information such as:
- your team’s movement route
- important fights
- revivals
- Arsenal captures
- nearby enemy activity
- enemy heatmaps
This gives you an effective way to improve your landing strategy over time.
After several matches, check whether your preferred landing location repeatedly appears inside heavy enemy activity.
Ask yourself:
- Am I dying because this location is too contested?
- Does my squad use predictable rotation routes?
- Is another nearby location consistently quieter?
- Do enemies regularly approach from the same direction?
Instead of permanently copying another player’s landing strategy, you can gradually develop one that works better for your own gameplay.
Common Free Fire Landing Mistakes
Always Landing Where a YouTuber Says the Best Loot Is
Loot distribution changes through updates.
Use current in-game information instead of relying entirely on old videos.
Following an Enemy Directly Onto a Weapon
If another player is clearly going to reach a gun before you, divert immediately.
Landing half a second later can end your match before it properly begins.
Automatically Choosing Peak
Peak remains popular, but its loot was reduced during Bermuda’s OB50 balancing changes.
Do not assume it is automatically the strongest loot area in every match.
Ignoring the Flight Path
A normally quiet location can become extremely crowded when the aircraft flies directly above it.
Looting for Too Long
Once you have enough equipment to survive a fight, begin thinking about:
- positioning
- enemy locations
- safe-zone movement
- rotations
Opening every room in a location is not always worth the time.
Having No Backup Landing Spot
Always identify another nearby option before touching the ground.
Assuming a “Safe Drop” Means No Enemies
No named Free Fire location is guaranteed to be empty.
Always watch surrounding parachutes.
Which Free Fire Landing Spot Is Best Overall?
There is no universal winner.
For Bermuda rank pushing, start with Mars Electric or Katulistiwa.
For aggressive Bermuda matches, consider Pochinok or Clock Tower.
For Solara mobility, The Hub is one of the strongest options.
For Kalahari action, Refinery remains a classic choice.
For Purgatory fights, Brasilia and Marbleworks stand out.
For NeXTerra mobility, Zipway provides an attractive combination of loot, structures, and movement options.
But the most important strategy applies to every map:
Check the flight path, loot-tier display, and enemy parachutes before committing to your landing spot.
That approach will remain useful even when future Free Fire updates change map layouts or loot distribution.
Frequently Asked Questions
What is the best landing spot in Free Fire?
There is no single best landing spot for every match. Mars Electric is a strong Bermuda choice for balanced gameplay, while aggressive players may prefer Pochinok or Clock Tower. The best location ultimately depends on the flight path, displayed loot tier, and number of enemies landing nearby.
What is the safest landing spot in Bermuda?
Mars Electric and Katulistiwa are good starting options for survival-focused players. However, neither location is permanently safe because the aircraft route can dramatically change how many players land there.
Which Free Fire landing spot is best for rank push?
Choose locations with enough loot but fewer immediate opponents. Mars Electric and Katulistiwa are useful Bermuda examples. Avoid blindly dropping at crowded locations such as Clock Tower when survival is your priority.
Which Free Fire landing locations are best for kills?
Aggressive players can consider Clock Tower or Pochinok on Bermuda, The Hub on Solara, Refinery on Kalahari, Brasilia or Marbleworks on Purgatory, and Grav Labs on NeXTerra.
Where is the best loot in Free Fire?
There is no permanently guaranteed best loot location. Free Fire’s OB54 update introduced loot-tier information during the parachuting phase, so check the current match’s displayed tier rather than relying entirely on static location lists.
Is Peak still a good landing spot?
Yes. Peak can still be useful for aggressive players, but it should not automatically be considered Bermuda’s best loot area. Loot distribution around Peak has been changed through previous Free Fire updates.
Is Alpine still available in Free Fire?
No. Garena removed Alpine and Bermuda 2.0 in the OB54 update released on June 23, 2026.
Does the aircraft flight path affect where I should land?
Yes. Locations directly underneath or close to the flight path are generally easier for more players to reach, which often increases early-game competition.
Final Thoughts
The best Free Fire landing spot depends more on the situation than the name printed on the map.
Players who are pushing rank should prioritise survivability, reasonable loot, and safe rotations.
Aggressive players can deliberately choose locations such as Clock Tower, Refinery, or Brasilia where early fights are more likely.
Regardless of your playstyle, avoid making your decision before seeing the aircraft route.
Use the flight path, current loot tier, and nearby enemy parachutes together.
That gives you a far better chance of starting each Battle Royale match from a position that matches your actual objective.